Arduino is the most common open source hardware for implementing cool projects, and PIR is most widely used to detect motion and human presence.
More details on how to interface Arduino with PIR.
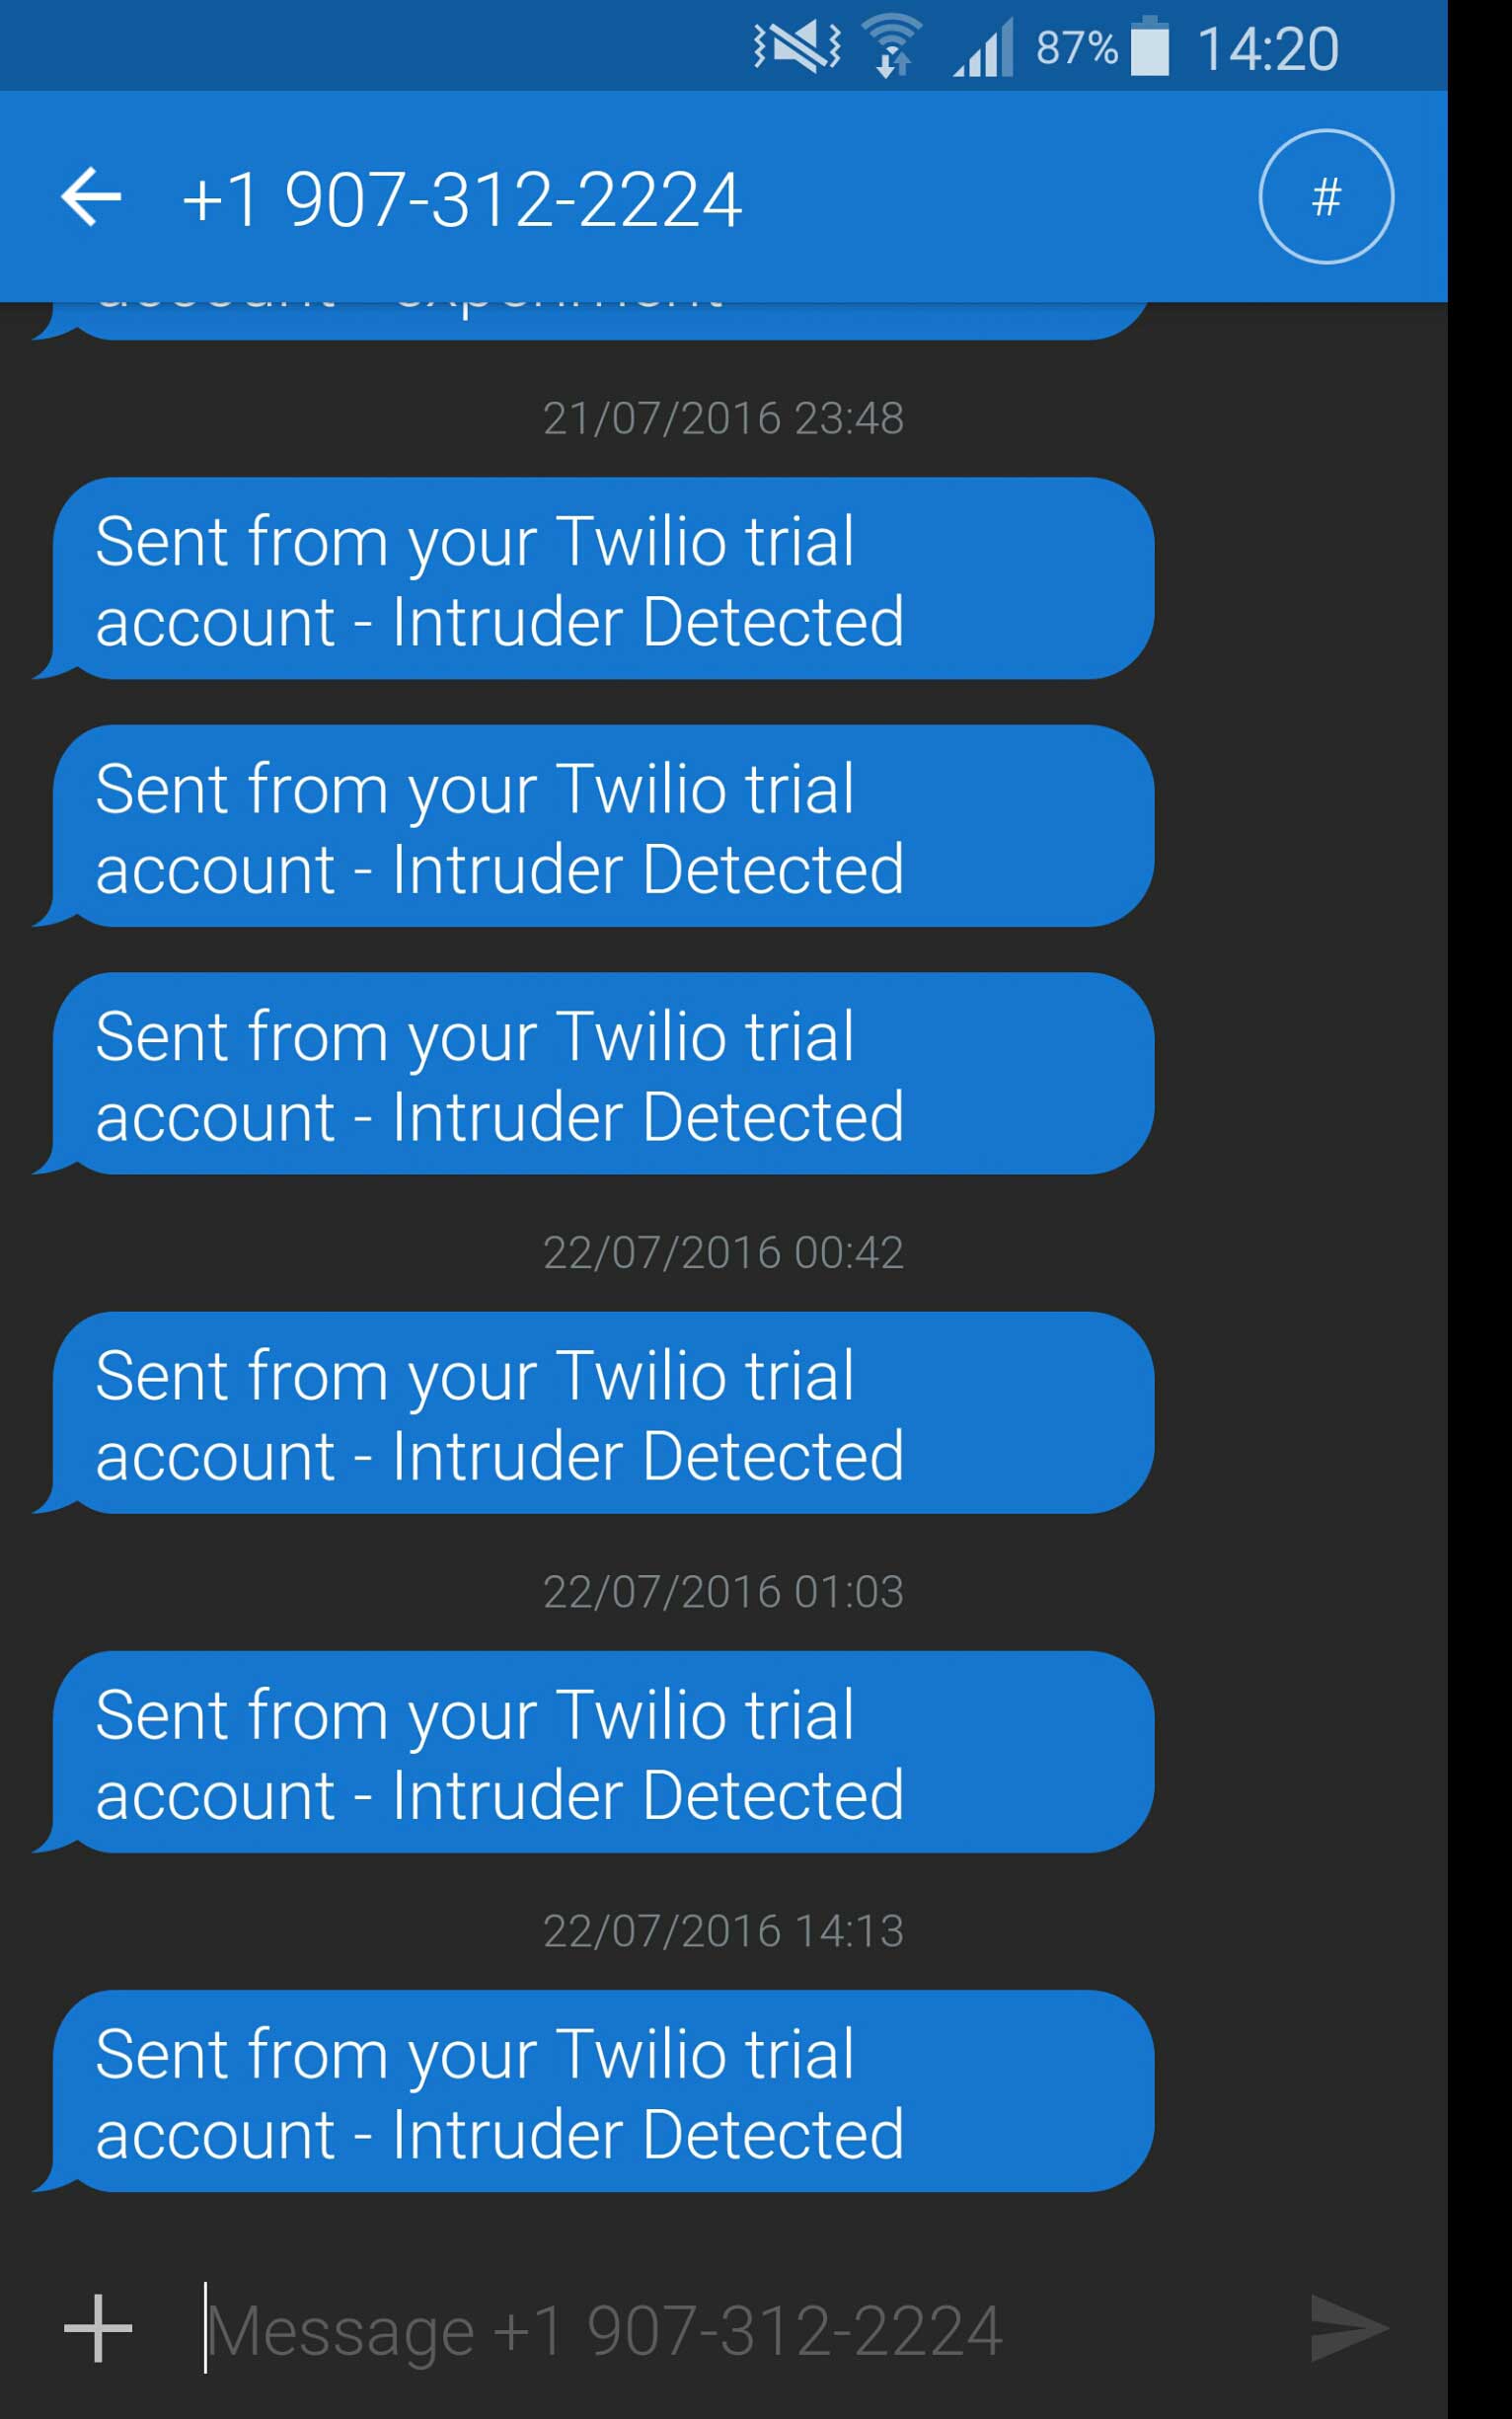
Today we would explain you a step-by-step guide on how you can build intruder detection system using Arduino and receive an alert via SMS.
Things you need:
- Arduino (2560 Mega recommended)
- Ethernet Shield compatible with Arduino. More details here.
- Motion Sensor PIR.
- Internet access to your Arduino
First of all, you need to connect your Arduino with Ethernet Shield and check if its working properly. If you are new to Arduino Ethernet shield, see this article on how you can use Arduino as a web server using the Ethernet shield.
We recommend the reader to see this detailed article on how you can interface Arduino with PIR module.
Up to this point, you have a knowledge of how you can interface Arduino with PIR and how you can use Arduino to act as a web server using the ethernet shield.
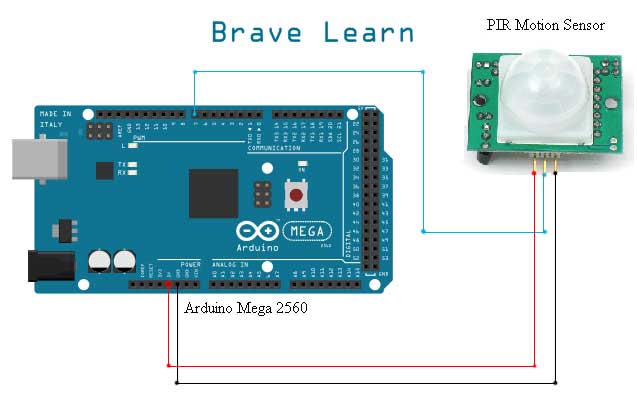
Connect your Arduino with PIR as shown below:

To receive an alert via SMS on motion detection you need to create an account at Twilio. Twilio is easy to use and provides large sets of API’s to use with multiple applications.
Twilio and a personal web server:
After creating a Trial account at Twilio, you need to verify your own mobile number on which you want to receive texts.
Twilio will provide you a step-by-step guide on how you can receive a text message or a phone call.
On Twilio Console Dashboard you will receive two secret keys namely: Account Sid and Auth Token
But how you can configure Arduino to connect to Twilio to send you an SMS?
To answer this question, we will use PHP language as Twilio provides PHP API to send an SMS. To do this, you will need to create a web server first. Its not that hard. Pick any free hosting sites they provide you domain name as well as complete server package. Alternatively, you can host your own webserver on your local computer. If you have Windows operating system, then you can use wamp server or Apache 2.0 if you have Linux.
After creating a free hosting account. Download PHP-libraries from Twilio website.
Upload the unzip folder on your web server using FTP or Cpanel and create a new PHP file and paste the following code onto it:
“send_message.php” code:
<?php

require "twilio-php/Services/Twilio.php";  // path to php file downloaded above

$AccountSid = "AC2713xxxxxxxxxxxxxxxxxxxxxxxe76"; // Your Account SID from www.twilio.com/console
$AuthToken = "df08xxxxxxxxxxxxxxxxxxxxxxxxx0";   // Your Auth Token from www.twilio.com/console

$client = new Services_Twilio($AccountSid, $AuthToken);

$message = $client->account->messages->create(array(
    "From" => "+19073122224", // From a valid Twilio number this will be provided to you by Twilio
    "To" => "+190731227856",   // Text this number to receive alerts. this is your own cell number
    "Body" => "Intruder Detected", //modify this message if you want
));

// Display a confirmation message on the screen
echo "Sent message {$message->sid}";
?>
Name this file anything you want like ‘send_message.php’. Make sure you have downloaded the files in the same folder you are creating this file or else you can modify the path in above code.
After performing all above steps, you can verify that you are receiving text alerts or not. Navigate to your PHP file “send_message.php” from any web-browser and you will receive a text message on your phone.
Make sure Twilio doesn’t block sending SMS to your regions. Verify here: Twilio GEO Permissions
If you have successfully received the text message upon navigating to your PHP file, then you have successfully configured Twilio and great you are almost done too.
Arduino Code:
After configuring the Twilio part burn the following code onto your Arduino and make sure you made the changes to your code as well like the Path to your send_message.php file and your domain name address, etc.open:
/// Brave Learn ///
/// https://bravelearn.com ///
// Connect PIR Motion Sensor to Arduino as shown in the diagram

#include <SPI.h>
#include <Ethernet.h>
// digital pin 7 has a pir attached to it.
int pirstat = 7;

// Configure your Twilio Server on which you have uploaded files
  EthernetClient twilio;
  char twilloserver[] = "www.bravelearn.com";  //Enter your server webaddress here

byte mac[] = { 0x00, 0xAA, 0xBB, 0xCC, 0xDA, 0x02 };  //Assigns MAC address to Arduino
IPAddress ip(192,168,1,177); //Assigns IP address to Arduino
EthernetServer server(80); //Assigns port to Arduino Server
// the setup routine runs once when you press reset:
void setup() {
  // initialize serial communication at 9600 bits per second:
  Serial.begin(9600);
  // make the PIR Digital pin an input:
  pinMode(pirstat, INPUT);
  Ethernet.begin(mac, ip);  //Start Ethernet shield of Arduino
  server.begin(); //Start Server behaviour at Arduino
}

// the loop routine runs over and over again forever:
void loop() {
  // read the input pin:
  boolean pir_read = digitalRead(pirstat); //boolean cuz we need 1/0 as motion detected or not
  // listen for incoming clients
  EthernetClient client = server.available();
  if (client) {
    // an http request ends with a blank line
    boolean currentLineIsBlank = true;
    while (client.connected()) {
      if (client.available()) {
        char c = client.read();
        // if you've gotten to the end of the line (received a newline
        // character) and the line is blank, the http request has ended,
        // so you can send a reply
        if (c == '\n' && currentLineIsBlank) {
          client.println("HTTP/1.1 200 OK");
          client.println("Content-Type: text/html");
          client.println("Connection: close");  // the connection will be closed after completion of the response
	  client.println("Refresh: 5");  // refresh the page automatically every 5 sec
          client.println();
          ///HTML Codes goes here //
          client.println("<!DOCTYPE HTML>");
          client.println("<html>");
          client.println("<title>Bravelearn | Arduino | Motion Detection </title>");
          client.println("<div align=center>");
          client.println("<a href=https://bravelearn.com/><img src=https://bravelearn.com/equiz/img/logo.png></a><br />");
          client.println("<h2>Welcome to Brave Learn Arduino Webserver with PIR Motion Sensor</h2>");
          client.println("<tr><td><hr size=4 color=#0099FF> </td></tr>");
          // print out the state of PIR sensor:
          if (pir_read == 1){
            Serial.println("Motion is Detected");
              if (twilio.connect(twilloserver, 80)) { //Connect Arduino to Twilio server via port 80 to generate sms as motion is detected
                // Make a HTTP request:
                twilio.println("GET /send_message.php HTTP/1.1"); //load the page which will generate sms
                twilio.println("Host: www.bravelearn.com"); // PRINT HTML headers to close the connection after loading the page.
                twilio.println("Connection: close");
                twilio.println();
               }
               client.print("<h3>Motion is Detected</h3>"); //print on web-browser that motion is detected
          }
         else {
           Serial.println("No Motion is present");  // Print on Serial Monitor that no motion is detected.
           client.print("<h3>No Motion is Detected</h3>");  //Print on web-browser that no motion is detected
         }

          client.println("<br/>");
          client.println("</div>");
          client.println("</html>");
          break;
        }
        if (c == '\n') {
          // you're starting a new line
          currentLineIsBlank = true;
        }
        else if (c != '\r') {
          // you've gotten a character on the current line
          currentLineIsBlank = false;
        }
      }
    } //close while loop
    client.stop();
  delay(5000);        // wait for 5 seconds before taking the reading again
 } //close if(client)
} // close void loop
If you have trouble understanding this code we recommend you to see this article. After burning the code, open your web-browser and navigate to ‘http://192.168.1.177’ to see the PIR status as shown below:

Upon motion detection, Arduino will connect to your web server to load the send_message.php file which will generate SMS to your phone. Not only you can receive an alert, but you can also sound an Alarm too. If you face any problems implementing this project and have any suggestions to improve it, please leave us a comment below:
