
Previously we have introduced on how to interface LM35 using Arduino Mega 2560. In this article, we will show you how to interface Ethernet Shield with Arduino 2560 and display temperature data using LM35 on your Web Browser.
See How to Interface LM35 using Arduino Mega 2560
To implement this project you need the following things:
- Arduino Board (any board will do the trick, but we recommend buying Mega2560 as we will be using this board for more projects) More details can be found here: Arduino Boards
- Ethernet Shield for Arduino. More details can be found here: Arduino Ethernet Shield
- LM-35 temperature sensor. It is easily available, and if you are reading this article we can assume you already have LM-35
- Breadboard or Veroboard
- connecting wires
- USB cable (comes with Arduino, but you can buy too. The cable is called USB A to B)
- Network cable that plugs into Ethernet shield connected to your home router.
Ethernet shield can be easily connected to Arduino by stacking on it. As explained in this article connect LM35 to Arduino (with Ethernet shield). The real-time implementation should look like this:
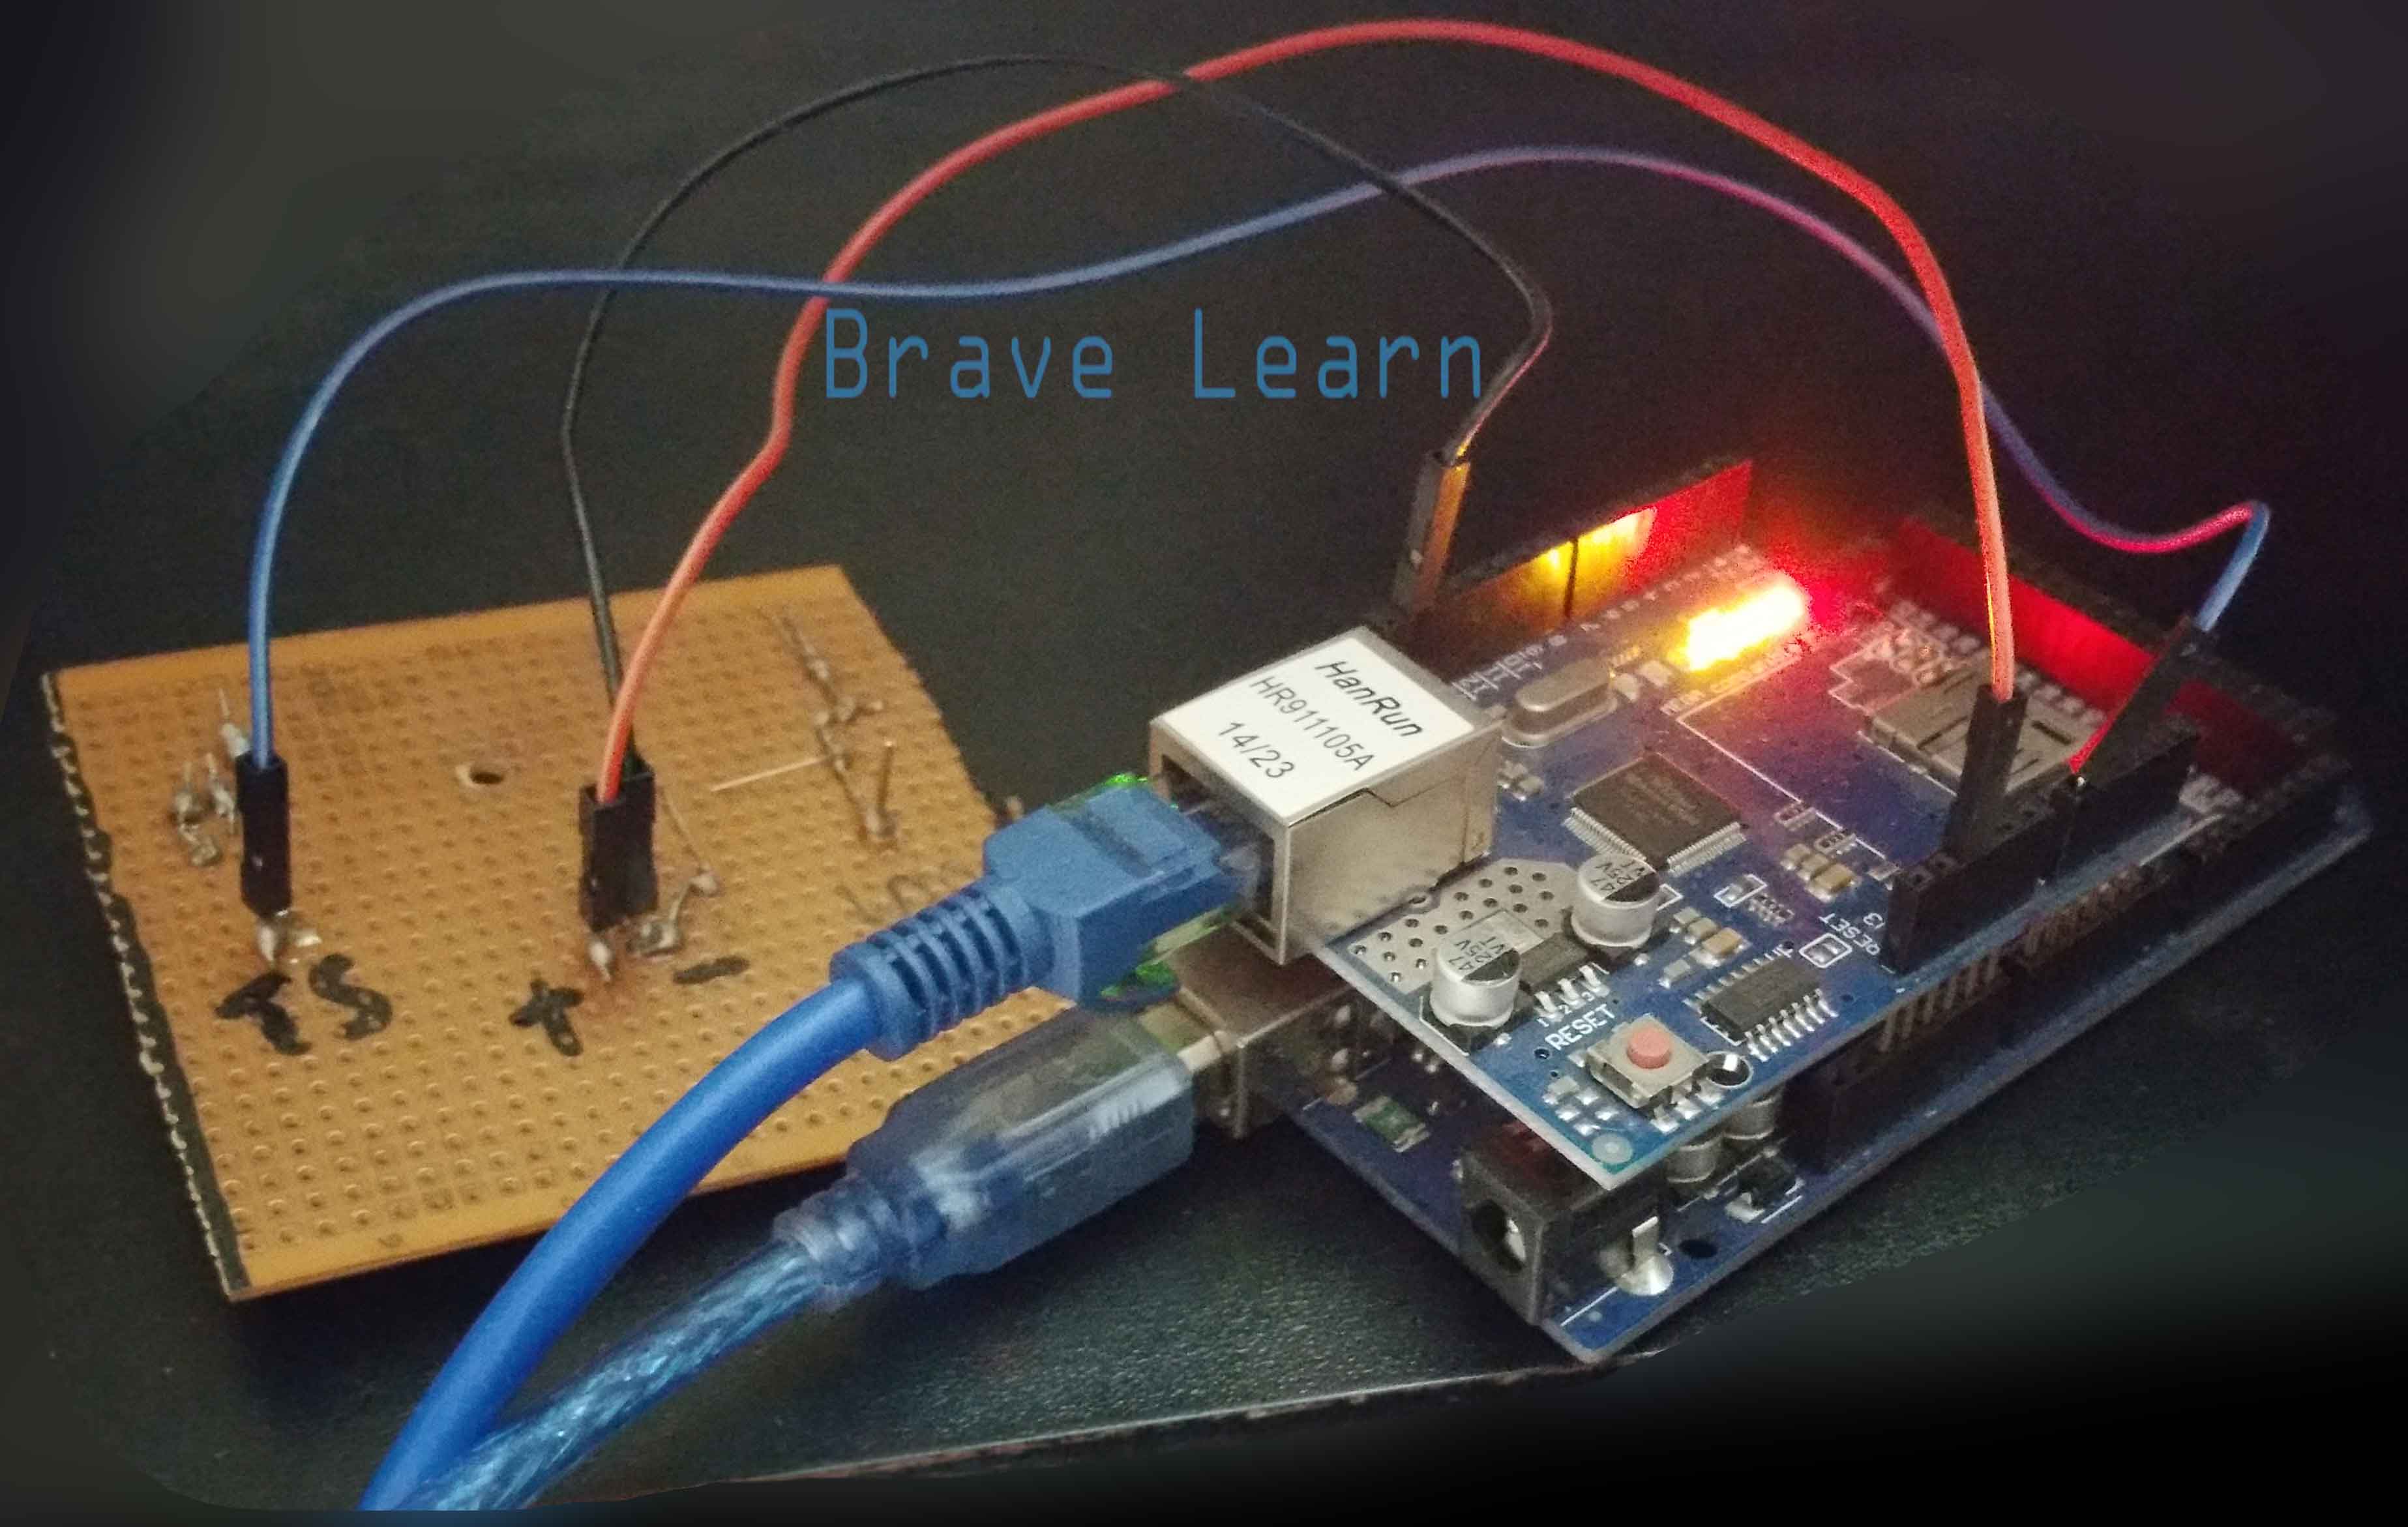
After connecting Arduino with Ethernet Shield and with LM35 on its port A0 (Analog port 0) burn the following code on it:
/// Brave Learn ///
/// https://bravelearn.com ///
// Connect LM35 to Arduino (with Ethernet shield) as shown in the diagram
#include <SPI.h>
#include <Ethernet.h>
int tempPin = 0;
float reading;
// Enter a MAC address and IP address for your controller below.
// The IP address will be dependent on your local network:
byte mac[] = {0xDE, 0xAD, 0xBE, 0xEF, 0xFE, 0xED };
IPAddress ip(192,168,1,177); //This is the ip of Ardunio. Make sure your computer is connected to the same network
// Initialize the Ethernet server library
// with the IP address and port you want to use
// (port 80 is default for HTTP):
EthernetServer server(80);
void setup() {
pinMode(A0, INPUT);
// start the Ethernet connection and the server:
Ethernet.begin(mac, ip);
server.begin();
}
void loop() {
reading = (5.0 * analogRead(tempPin) * 100.0) / 1024;
// listen for incoming clients
EthernetClient client = server.available();
if (client) {
// an http request ends with a blank line
boolean currentLineIsBlank = true;
while (client.connected()) {
if (client.available()) {
char c = client.read();
// if you've gotten to the end of the line (received a newline
// character) and the line is blank, the http request has ended,
// so you can send a reply
if (c == '\n' && currentLineIsBlank) {
// send a standard http response header
client.println("HTTP/1.1 200 OK");
client.println("Content-Type: text/html");
client.println("Connection: close"); // the connection will be closed after completion of the response
client.println("Refresh: 5"); // refresh the page automatically every 5 sec
client.println();
///HTML Codes goes here //
client.println("<!DOCTYPE HTML>");
client.println("<html>");
client.println("<title>Bravelearn | Arduino | Temperature Sensor Data </title>");
client.println("<div align=center>");
client.println("<a href=https://bravelearn.com/equiz><img src=https://bravelearn.com/equiz/img/logo.png></a><br />");
client.println("<h2>Welcome to Brave Learn Arduino Webserver with LM-35 Temperature Sensor</h2>");
client.println("<tr><td><hr size=4 color=#0099FF> </td></tr>");
// output the value of each analog input pin
client.print("<h3>Temperature Right Now is: ");
client.println((float)reading);
client.print(" ℃");
client.println("</h3>");
client.println("<br/>");
client.println("</div>");
client.println("</html>");
break;
}
if (c == '\n') {
// you're starting a new line
currentLineIsBlank = true;
}
else if (c != '\r') {
// you've gotten a character on the current line
currentLineIsBlank = false;
}
}
}
// give the web browser time to receive the data
delay(1);
// close the connection:
client.stop();
delay(10000); // wait for 10 seconds before taking the reading again
}
}
The important thing here is to note that the IP assigned to Arduino is 192.168.1.177, you can assign any ip you like but make sure your browser i.e. PC or Mobile and Arduino are on the same network. Most home routers have the network address 192.168.1.x where x denotes the host machine id. In this case, 177 is the id of the machine where Arduino is placed your computer can be anywhere in 2-254 i.e. 192.168.1.10 can be the address of your computer and make sure your computer has the subnet mask of 255.255.255.0
After successful connections, you will get the following page after navigating to 192.168.1.177 on your web-browser
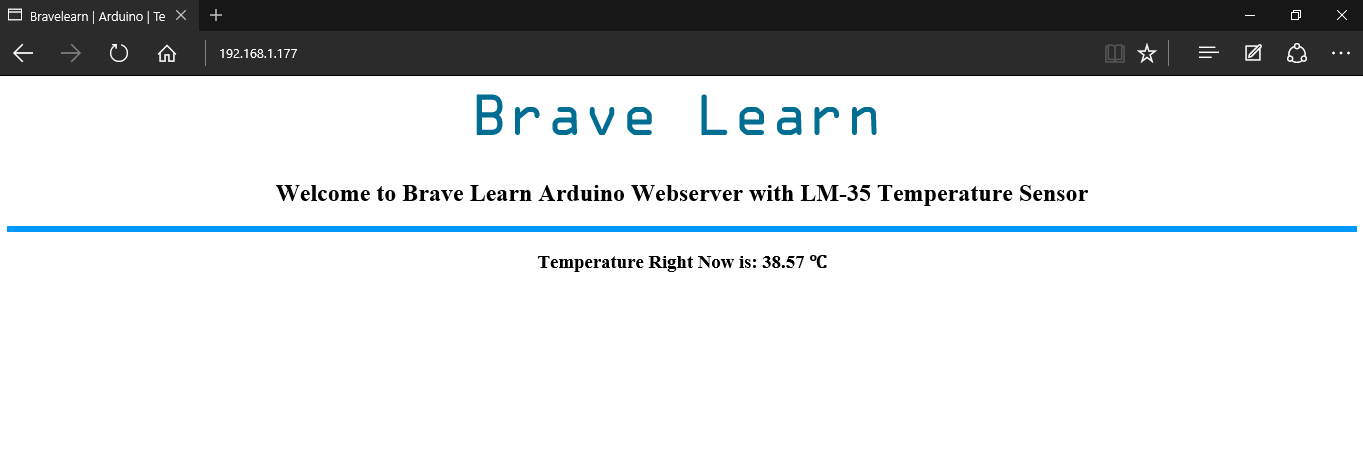
Now you can easily monitor your room temperature wirelessly connected to your home router. You can even open ports in your router configuration to monitor room temperature remotely anywhere from the world.
Try this simple project and don’t forget to share your reviews in the comments below also share it with your friends. Well, this is a simple project we will show how can we use Windows Phone to build an app that reads this temperature.