
This article will help you implement a simple project that will require limited hardware and you can develop an app that can monitor your room or home temperature using Windows Phone.
The major focus of this article is to help you develop a Windows Phone app using Windows Phone SDK ver 8.0
First of all, you need few things to implement this:
Things you need:
- Arduino Board (Preferably Arduino Mega 2560)
- Ethernet Shield (This is plug n play shield that can be stacked on Arduino 2560) More details: Arduino Ethernet Shields
- LM35 Temperature Sensor
- A Windows Phone
- Connecting Wires / Breadboard
If you are new to Arduino we recommend try implementing this project: Arduino interface with LM35
Also, we recommend you to see this project too: Arduino interface LM35 with Ethernet Shield
On the software side you need:
- Microsoft Visual Studio 2012 or later
- Windows Phone SDK 8.0
- Arduino software (available on their website)
Open Visual Studio 2012 and click on New Project. Make sure you have install Windows Phone SDK first.
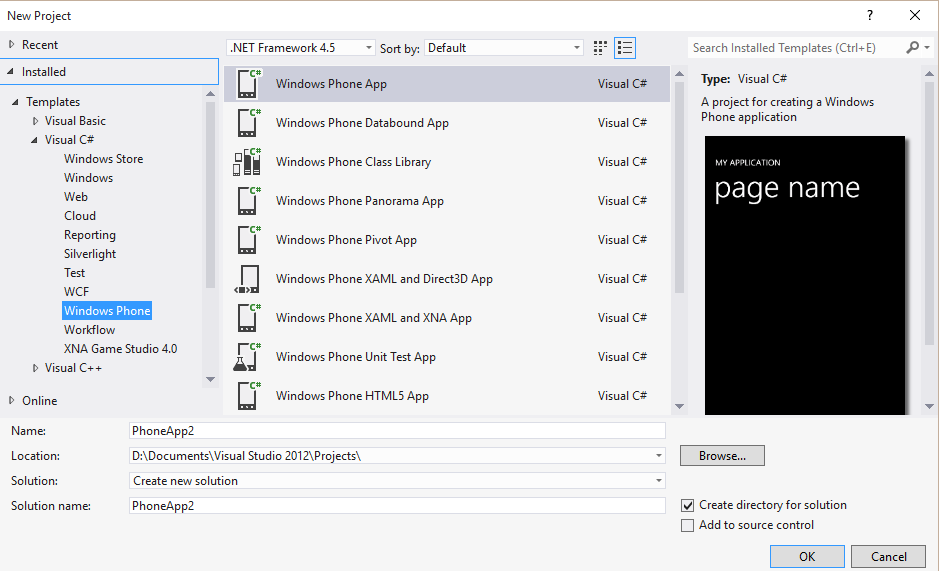
Type the name of app and solution name like: “BL_Webserver_LM_35”
After clicking OK a new dialog box will appear asking for you to select target OS. Select Windows Phone 8.0
After that Visual Studio will prepare a designer for you and in your Solution Explorer appearing on the right side you will find two files namely: (MainPage.xaml and MainPage.xaml.cs).
You can use a toolbox to add buttons and other stuff on the app. From toolbox drag and drop textblock and name it “DataDisplay” from toolbox drag and drop button and name it: “RefreshData”. Now if you are following our naming convention you have the following code in your “MainPage.xaml” file:
<phone:PhoneApplicationPage
    x:Class="BL_Webserver_LM_35.MainPage"
    xmlns="http://schemas.microsoft.com/winfx/2006/xaml/presentation"
    xmlns:x="http://schemas.microsoft.com/winfx/2006/xaml"
    xmlns:phone="clr-namespace:Microsoft.Phone.Controls;assembly=Microsoft.Phone"
    xmlns:shell="clr-namespace:Microsoft.Phone.Shell;assembly=Microsoft.Phone"
    xmlns:d="http://schemas.microsoft.com/expression/blend/2008"
    xmlns:mc="http://schemas.openxmlformats.org/markup-compatibility/2006"
    mc:Ignorable="d"
    FontFamily="{StaticResource PhoneFontFamilyNormal}"
    FontSize="{StaticResource PhoneFontSizeNormal}"
    Foreground="{StaticResource PhoneForegroundBrush}"
    SupportedOrientations="Portrait" Orientation="Portrait"
    shell:SystemTray.IsVisible="True">

    <!--LayoutRoot is the root grid where all page content is placed-->
    <Grid x:Name="LayoutRoot" Background="Transparent">
        <Grid.RowDefinitions>
            <RowDefinition Height="Auto"/>
            <RowDefinition Height="*"/>
        </Grid.RowDefinitions>

        <!-- LOCALIZATION NOTE:
            To localize the displayed strings copy their values to appropriately named
            keys in the app's neutral language resource file (AppResources.resx) then
            replace the hard-coded text value between the attributes' quotation marks
            with the binding clause whose path points to that string name.

            For example:

                Text="{Binding Path=LocalizedResources.ApplicationTitle, Source={StaticResource LocalizedStrings}}"

            This binding points to the template's string resource named "ApplicationTitle".

            Adding supported languages in the Project Properties tab will create a
            new resx file per language that can carry the translated values of your
            UI strings. The binding in these examples will cause the value of the
            attributes to be drawn from the .resx file that matches the
            CurrentUICulture of the app at run time.
         -->

        <!--TitlePanel contains the name of the application and page title-->
        <StackPanel x:Name="TitlePanel" Grid.Row="0" Margin="12,17,0,28">
            <TextBlock Text="Brave Learn | Webserver | Temperature Sensor | LM35" Style="{StaticResource PhoneTextNormalStyle}" Margin="12,0" FontSize="18" HorizontalAlignment="Left"/>
            <TextBlock Text="Brave Learn" Margin="58,-7,0,0" Style="{StaticResource PhoneTextTitle1Style}" Foreground="#FF00AFE7" VerticalAlignment="Center" HorizontalAlignment="Left"/>
        </StackPanel>

        <!--ContentPanel - place additional content here-->
        <Grid x:Name="ContentPanel" Grid.Row="1" Margin="12,0,12,0">
            <TextBlock x:Name="DataDisplay" HorizontalAlignment="Left" Margin="10,41,0,0" TextWrapping="Wrap" VerticalAlignment="Top" Height="256" Width="436"/>
            <Button x:Name="RefreshData" Content="Refresh Data" Margin="85,468,88,34" Click="RefreshData_Click" Height="108" Width="283" FontSize="34" FontFamily="Segoe UI Semibold" HorizontalAlignment="Center" VerticalAlignment="Center" Background="#FF508D87"/>
        </Grid>
        <!--Uncomment to see an alignment grid to help ensure your controls are
            aligned on common boundaries.  The image has a top margin of -32px to
            account for the System Tray. Set this to 0 (or remove the margin altogether)
            if the System Tray is hidden.

            Before shipping remove this XAML and the image itself.-->
        <!--<Image Source="/Assets/AlignmentGrid.png" VerticalAlignment="Top" Height="800" Width="480" Margin="0,-32,0,0" Grid.Row="0" Grid.RowSpan="2" IsHitTestVisible="False" />-->
    </Grid>

</phone:PhoneApplicationPage>
If you have done all of the above steps then great news you are almost half way through it.
After designing its time to add some C# code on the App. Open “MainPage.xaml.cs” from solution explorer. Since we are using dot Net to fetch data from Arduino Webserver you need to add dot net libraries in it.
Make sure you have installed NuGet in your Visual Studio see more details here
After installing Nu-Get open tools->NuGet Package Manager -> Manage NuGet Package for Solutions . A new dialog box will appear search for Microsoft HTTP Client Libraries. Install these libraries
After installing necessary packages paste the following code into “MainPage.xaml.cs”
using System;
using System.Diagnostics;
using System.Text;
using System.IO;
using System.Collections.Generic;
using System.Linq;
using System.Net;
using System.Net.Http;
using System.Windows;
using System.Windows.Controls;
using System.Windows.Navigation;
using System.Threading.Tasks;
using Microsoft.Phone.Controls;
using Microsoft.Phone.Shell;
using BL_Webserver_LM_35.Resources;

namespace BL_Webserver_LM_35
{
    public partial class MainPage : PhoneApplicationPage
    {
        private void loadHTMLCallback(Object sender, DownloadStringCompletedEventArgs e)
        {
           string statusdata;
           try
            {
               var textData = (string)e.Result;
               statusdata = textData;
             }
            catch
            {
                statusdata = "Looks like BraveLearn Arduino is not on the network";
            }

            DataDisplay.Text = statusdata;
        }
        // Constructor
        public MainPage()
        {
            WebClient statusread = new WebClient();
            statusread.DownloadStringCompleted += new DownloadStringCompletedEventHandler(loadHTMLCallback);
            statusread.DownloadStringAsync(new Uri("http://192.168.1.177/~1"));


            InitializeComponent();

            // Sample code to localize the ApplicationBar
            //BuildLocalizedApplicationBar();
        }

        private void RefreshData_Click(object sender, RoutedEventArgs e)
        {
            WebClient statusread = new WebClient();
            statusread.DownloadStringCompleted += new DownloadStringCompletedEventHandler(loadHTMLCallback);
            statusread.DownloadStringAsync(new Uri("http://192.168.1.177/~1" + Guid.NewGuid()));
        }
    }
}
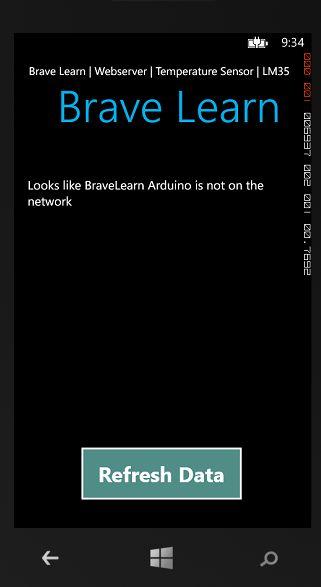
Build you app and run it on the emulator WVGA 512MB. Of course, your emulator will display this message: “Looks like BraveLearn Arduino is not on the network” as you haven’t uploaded the code on Arduino.
Up to this point, you have successfully built your WindowsPhone App.
Now it is time to make some changes in Arduino + WebServer + LM35 code. We recommend you to visit this article on
We recommend you to visit this article on how to interface Ethernet Shield with Arduino and display temperature on Web-Browser using LM35
First, plug the Ethernet shield on Arduino Mega 2560 and connect it to your home network.
Make sure your home network has the following network ip: 192.168.1.x where x is the host machine address.
In this case, Arduino’s address is 192.168.1.177. You can also navigate using your web browser to monitor your room temperature as well using this address: http://192.168.1.177
Connect LM35 to Arduino as explained in this article
Burn the following code on Arduino:
Arduino Code:
/// Brave Learn ///
/// https://bravelearn.com ///
// Connect LM35 to Arduino (with Ethernet shield) as shown in the diagram
#include <SPI.h>
#include <Ethernet.h>
int tempPin = 0;
float reading;
boolean incoming = 0;
// Enter a MAC address and IP address for your controller below.
// The IP address will be dependent on your local network:
byte mac[] = {0xDE, 0xAD, 0xBE, 0xEF, 0xFE, 0xED };
IPAddress ip(192,168,1,177); //This is the ip of Ardunio. Make sure your computer is connected to the same network
// Initialize the Ethernet server library
// with the IP address and port you want to use
// (port 80 is default for HTTP):
EthernetServer server(80);
void setup() {
pinMode(A0, INPUT);
// start the Ethernet connection and the server:
Ethernet.begin(mac, ip);
server.begin();
}
void loop() {
reading = (5.0 * analogRead(tempPin) * 100.0) / 1024;
// listen for incoming clients
EthernetClient client = server.available();
if (client) {
// an http request ends with a blank line
boolean currentLineIsBlank = true;
while (client.connected()) {
if (client.available()) {
char c = client.read();
// if you've gotten to the end of the line (received a newline
// character) and the line is blank, the http request has ended,
// so you can send a reply
if (c == '\n' && currentLineIsBlank) {
// send a standard http response header
client.println("HTTP/1.1 200 OK");
client.println("Content-Type: text/html");
client.println("Connection: close"); // the connection will be closed after completion of the response
client.println("Refresh: 5"); // refresh the page automatically every 5 sec
client.println();
///HTML Codes goes here //
client.println("<!DOCTYPE HTML>");
client.println("<html>");
client.println("<title>Bravelearn | Arduino | Temperature Sensor Data </title>");
client.println("<div align=center>");
client.println("<a href=https://bravelearn.com/equiz><img src=https://bravelearn.com/equiz/img/logo.png></a><br />");
client.println("<h2>Welcome to Brave Learn Arduino Webserver with LM-35 Temperature Sensor</h2>");
client.println("<tr><td><hr size=4 color=#0099FF> </td></tr>");
// output the value of each analog input pin
client.print("<h3>Temperature Right Now is: ");
client.println((float)reading);
client.print(" ℃");
client.println("</h3>");
client.println("<br/>");
client.println("</div>");
client.println("</html>");
break;
}
/// Checks for URL commands like send data to WP or other actions
if(incoming && c == ' '){
incoming = 0;
}
if(c == '~'){ //only html characters are allowed.
incoming = 1;
}
//Checks for the URL string ~1
// This will see if url is http://192.168.1.177/~1 then it will print plain data which is used by WP to display on its App.
if(incoming == 1){
if (c == '1'){ // send status to WindowsPhone
client.print("Temperature Right Now is: ");
client.print(reading);
client.print(" ℃");
break;
}
}
if (c == '\n') {
// you're starting a new line
currentLineIsBlank = true;
}
else if (c != '\r') {
// you've gotten a character on the current line
currentLineIsBlank = false;
}
}
}
// give the web browser time to receive the data
delay(1);
// close the connection:
client.stop();
delay(10000); // wait for 10 seconds before taking the reading again
}
}
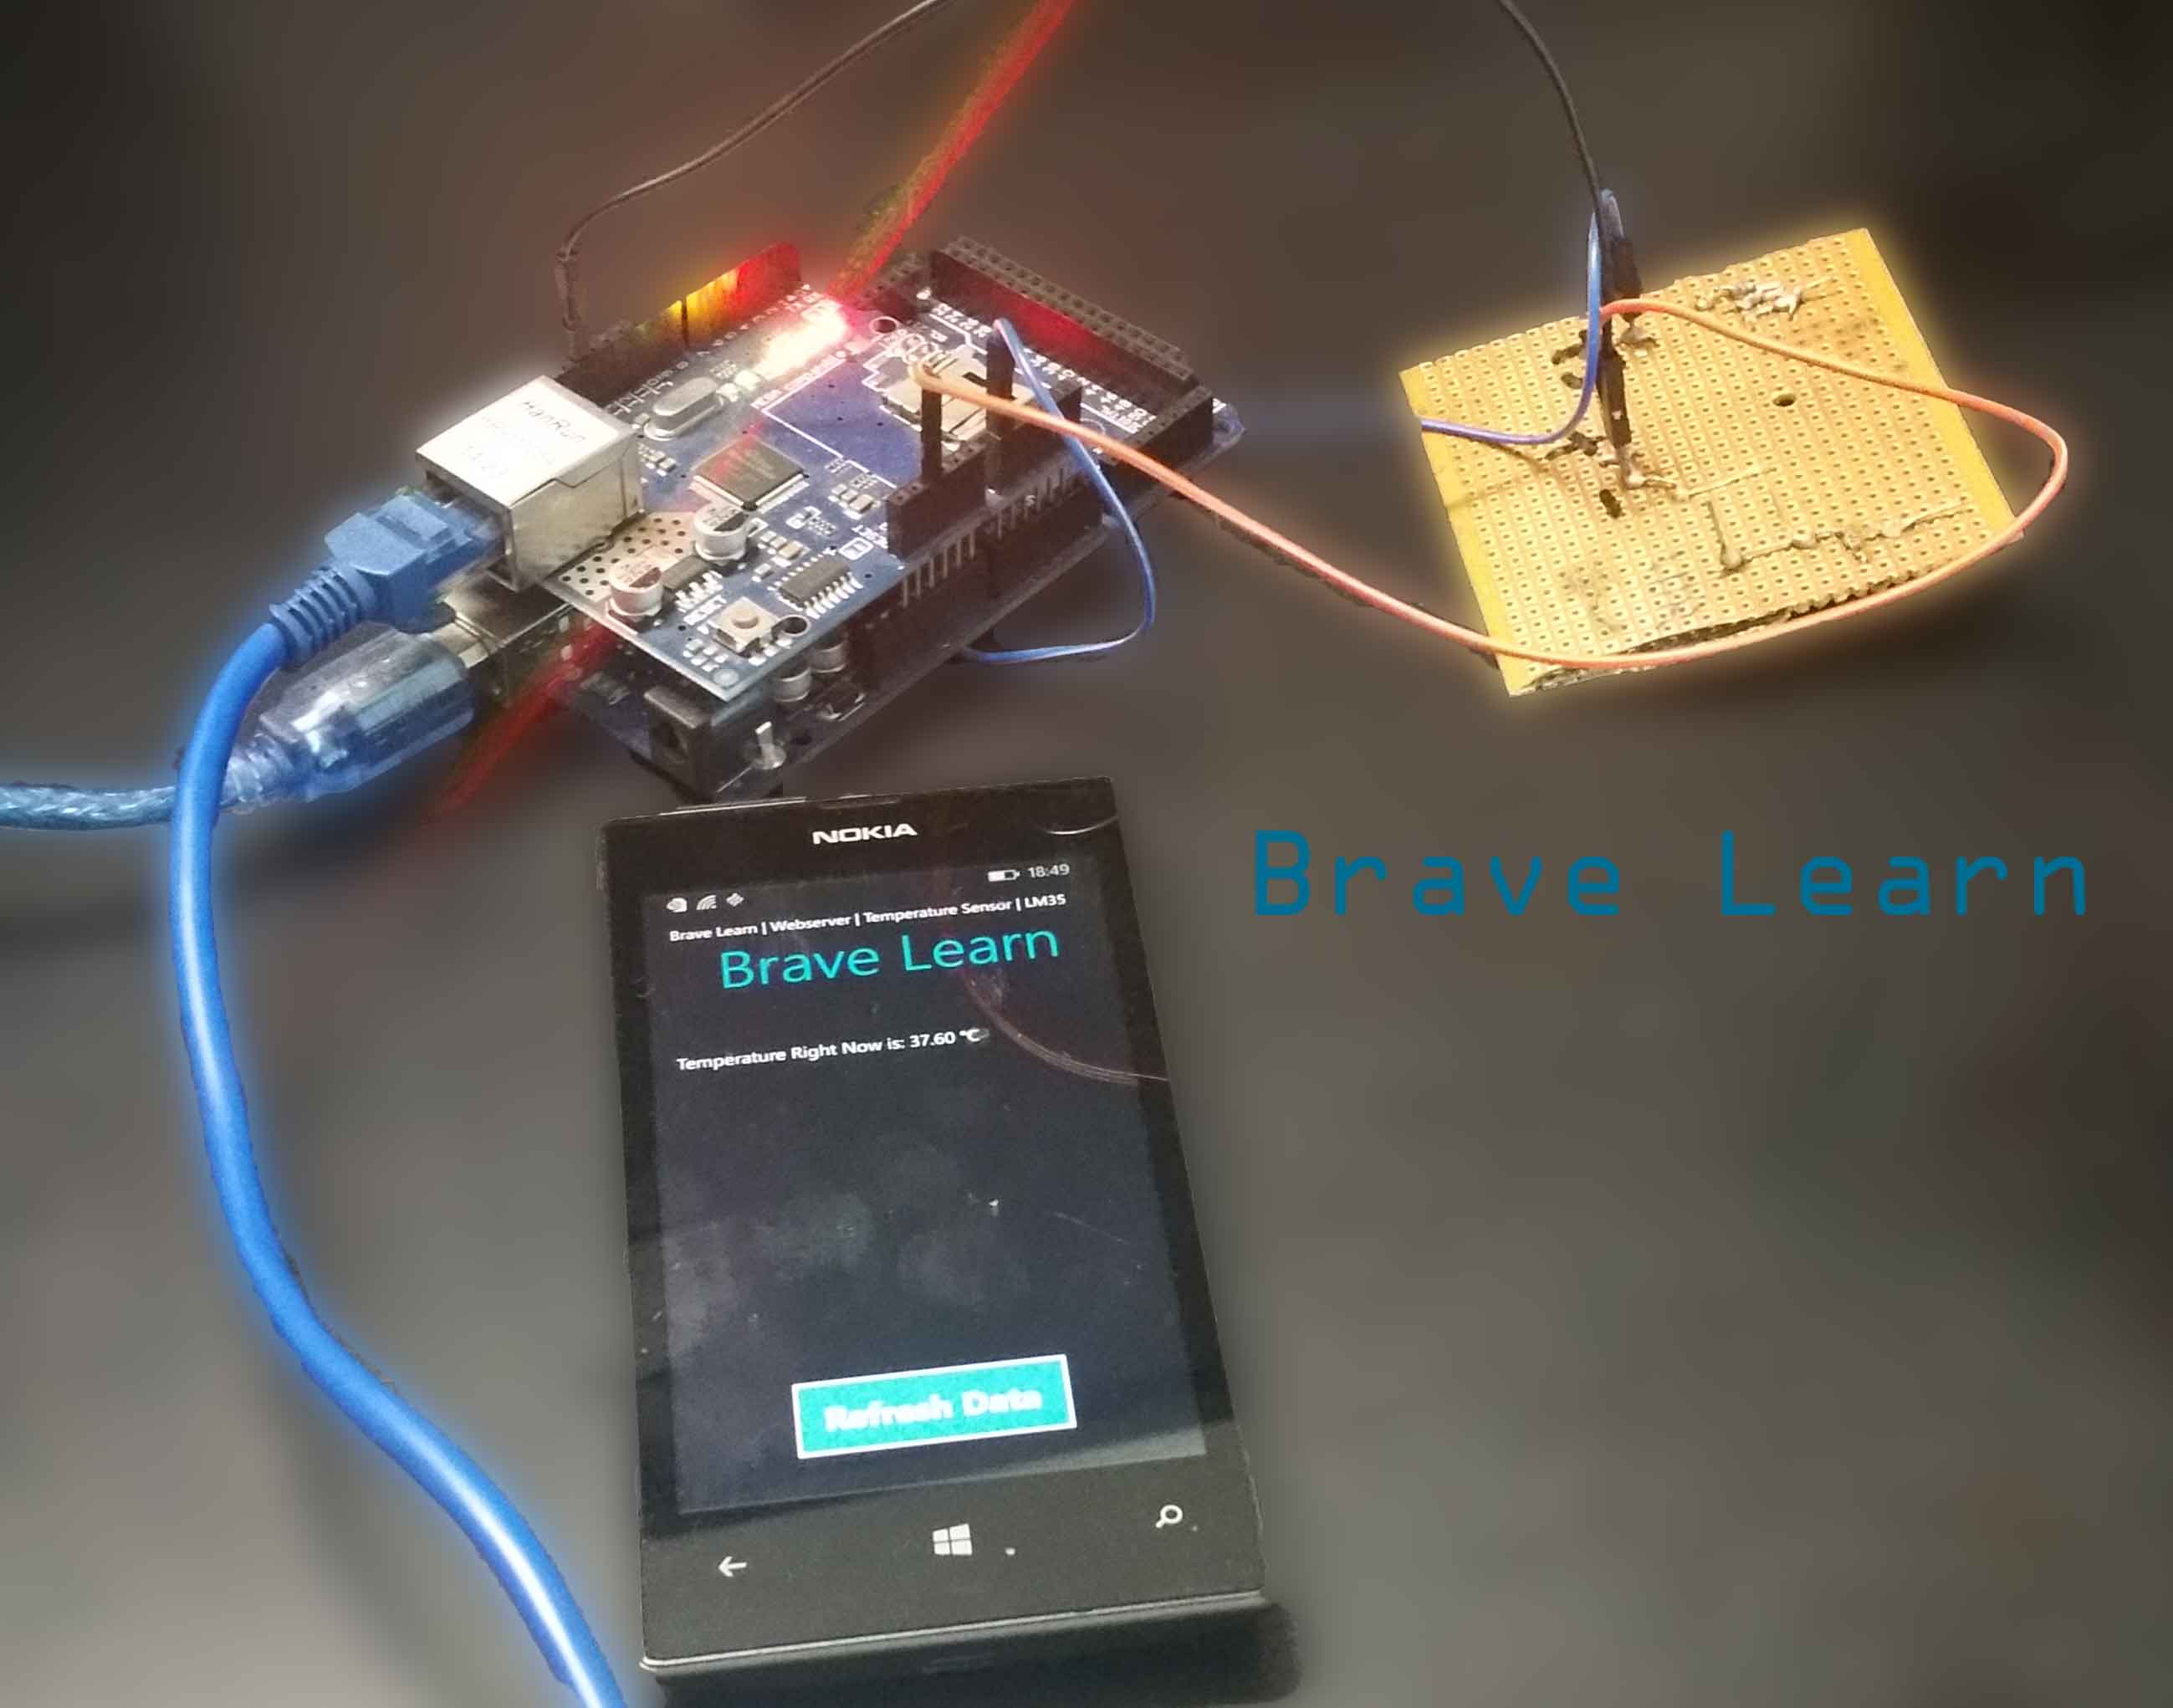
This code has a slight modification then the code in this article We have added a new variable “incoming” which detects that if there is a URL change then Arduino WebServer will display the data on WebBrowser differently, and that data is used to display on Windows Phone App as shown below:
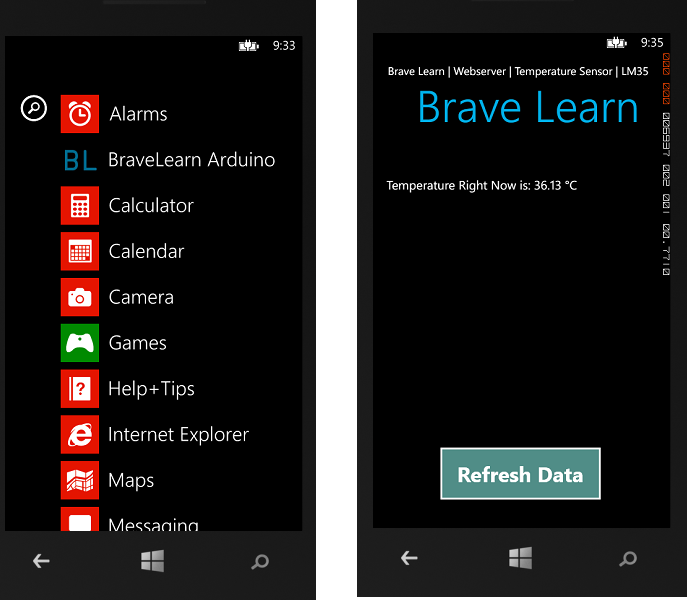
That’s it you have successfully built the Windows Phone App to display the temperature of your Room/Home. If you have any problems/suggestions leave us a comment below.